Git + MAMP + SiteGround
For too long now I have put off the chore of getting my local development environment set up in a way that would allow me to use Git to push my code directly to SiteGround. I had tried in the past but always ended up hitting a stumbling block somewhere along the way. There is a great tutorial on the process by my friends at 9seeds, that I used as a starting point. But, as I’m a big fan of doing, I wanted to blog about my specific process so that I could refer back to it when I need to do it again.
Here are the pieces of the puzzle I’m trying to put together:
- Local environment using MAMP
- Web hosting at SiteGround
- 3rd party code storage at BitBucket
- Use Git to keep all 3 of the above in sync
To follow is the step-by-step process I used to reach Git + MAMP + SiteGround glory.
Not So Fast!
Let me start by telling you how I took one of my sites offline for over an hour. Think of this as what NOT to do…
The Git repo that SiteGround creates for you is going to contain all of the WordPress core files and everything from the wp-content folder on your server. This means all of your uploaded media at the time you create the repo.
My previously existing local repo doesn’t include the WordPress core files or any of the uploads to the media directory. When I force-pushed MY Git repo from localhost to SiteGround, it deleted all the WordPress files along with the uploads directory. (remember how all the tutorials tell you to backup your files and database first? This is exactly why!) I had a backup and after a short freak out, I had my site back online.
Now that you know how NOT to do it, let’s move on to the proper way.
SSH Keys
In order to connect to the server, you’re going to need to add your SSH key to your SiteGround account. To do this, start by opening the Terminal app on your Mac. On the command line, type the following:
pbcopy < ~/.ssh/id_rsa.pub
This will copy your public SSH key to your clipboard.
Next, in Cpanel, click the SSH/Shell Access link and add your SSH key here:
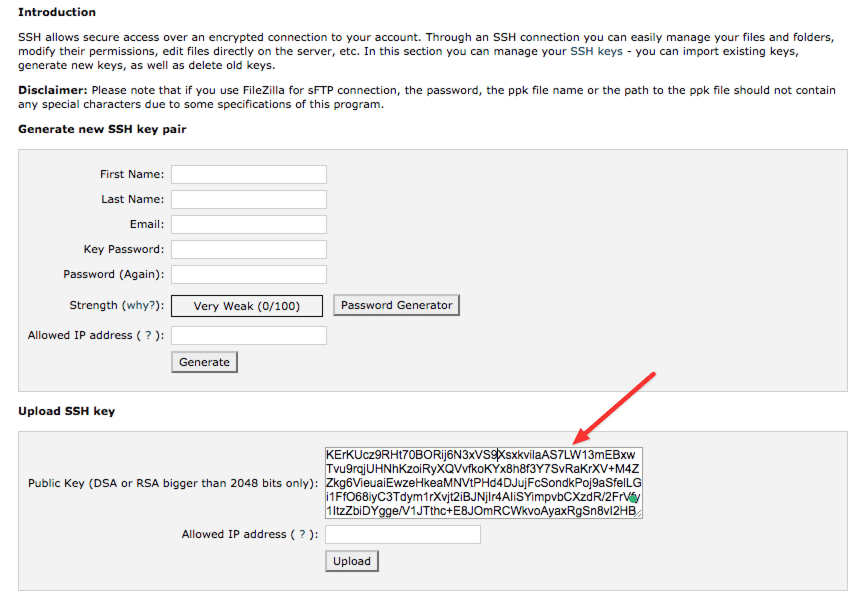
Once that’s saved, return to the Cpanel main page as we’ll be using it again in a few minutes.
MAMP
I’m using MAMP Pro 4.x in this demo. If you using the free version of MAMP, your screens may look a little different.
In MAMP, start by adding a new hosting entry. When it comes time to set the document root, create a new folder inside your htdocs folder and select the new folder you just created.
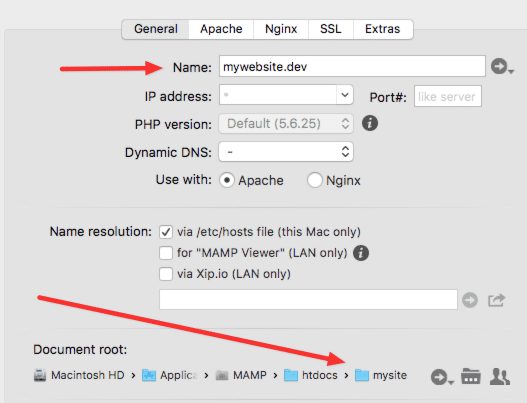
Side note, if your live site is using SSL, I STRONGLY suggest that you set up a self-signed cert on the SSL tab. Read this tutorial if you need help with that step.
When you save the settings for your new local dev site, MAMP will restart. As it does, it will create two files in your new folder. You need to delete those files before the next step.
SiteGround Git Repo
Next, you will need to create a Git repo on SiteGround. In Cpanel, click the SG-Git link and you’ll see a list similar to this:
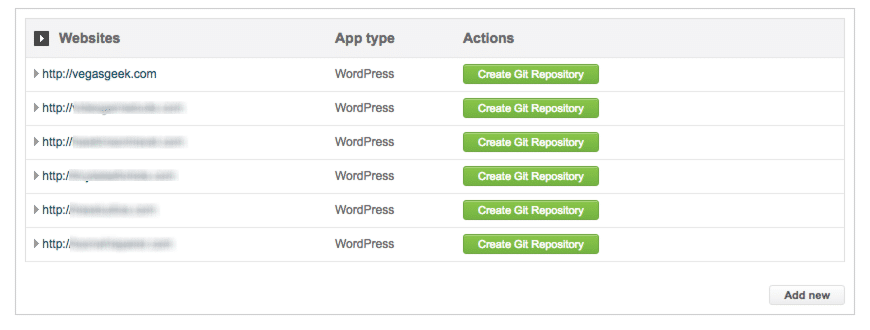
Click the Create Git Repository button next to the appropriate domain name. It will take a minute for the repo to be created. When it’s done you’ll see a screen that looks something like this:
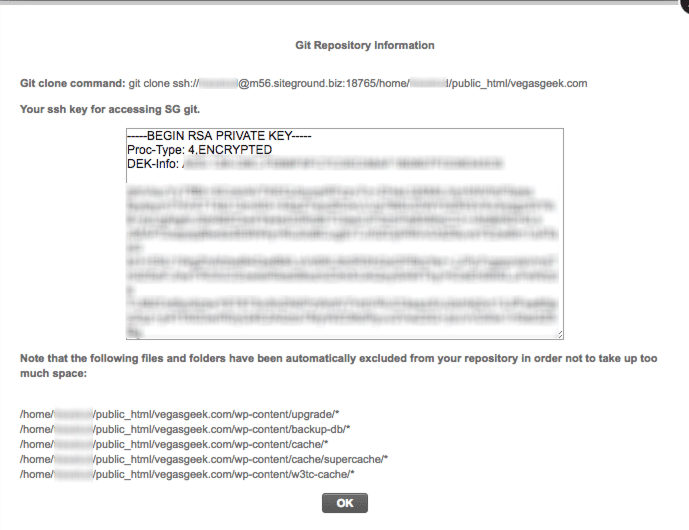
You will want to copy the Git Clone command to the clipboard. We’ll use that in the next step.
Clone Repo to Local
Open the Terminal app on your Mac. Change directories to get into the htdocs folder in MAMP. Paste the command you have in the clipboard onto the command line in Terminal and then add the name of the folder you created during the MAMP setup step. It should look something like this:
git clone ssh://[email protected]:18765/home/xxxxxx/public_html/vegasgeek.com mysite
Depending on the size of the site, this step can take some time to complete. When it’s done, the terminal window will look something like this:
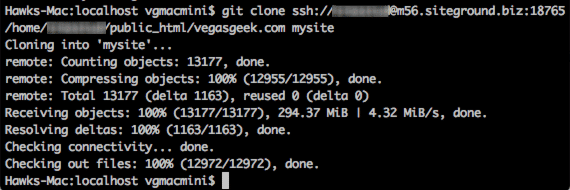
At this point, you now have a complete copy of all your site files in a brand new folder. Time to start setting up WordPress.
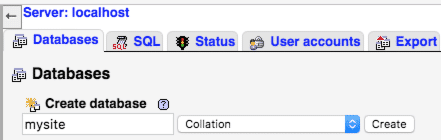
Setup a Database
In a browser window, navigate to https://127.0.0.1/phpMyAdmin to access the databases on your local machine. Create a new database for your site.
Update wp-config.php
The Git repo created by SiteGround contains a copy of wp-config.php. Since it is set up to connect to the database on the live server, you’re going to need to modify it in order to make it work on your local system. I did this by creating a simple if/else statement to point to the proper database depending on the environment. It looks like this:
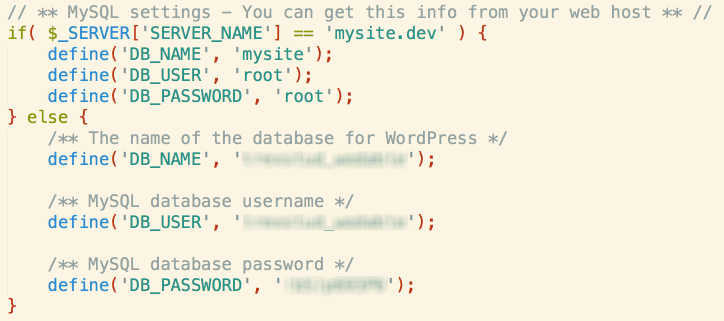
Once that’s saved, rename the file to something like wp-config.php-hold. We’ll get put it back in place later, we just need it out of our way for a few minutes.
Run WordPress Setup
In a browser, navigate to your newly created local site. In my case, https://mysite.dev/. You should be presented with the very familiar WordPress setup screen.
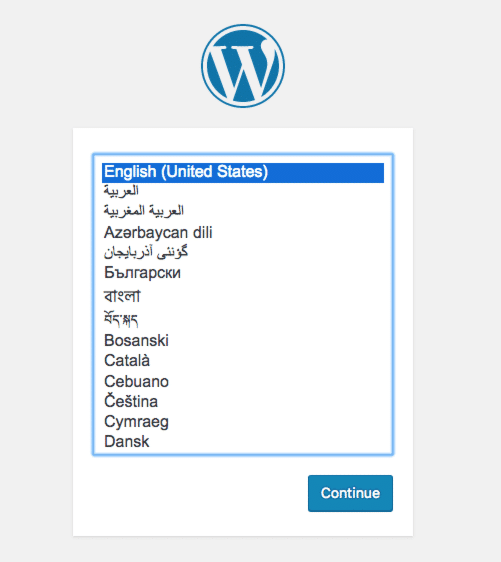
It doesn’t matter what you name the site, or what username/password you use during this step. You’ll be replacing the database with your live database in the next step. But before you move on, go ahead and delete the newly created wp-config.php file, and rename the one you edited in the previous step back to wp-config.php
Migrate the Database
Moving the database can be a bit tricky if you go the route of doing an export and import using phpMyAdmin. This is because you’d need to do a second step of doing a search and replace in the database to change all your .com domains to .dev in order for the site to work locally. A much easier way to move the database is to use Migrate DB Pro.
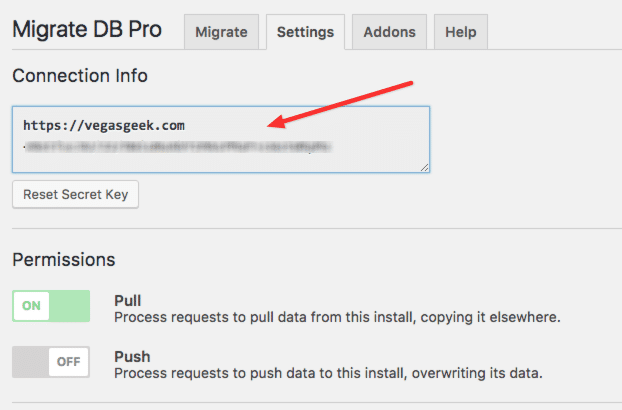
You will need to install and activate the plugin on both the live site and the local site. Once you do, on the live site you’ll need set up the site to allow a pull request and then copy the migration URL found here:
Then, on your local install, initiate the pull on the migration tab like so:
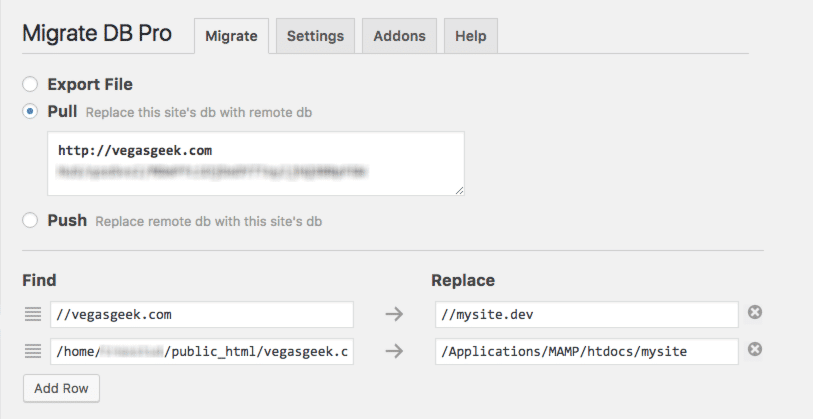
As you can see at the bottom of that screenshot, the find and replace is done for you automatically during the migration process.
Depending on the size of your site, this process can take some time. Once it’s done, you will be logged out of your local install and you can now log in with the same username/password you use on your live site. You can also go visit the local website and it should look like an exact copy of your live site!
Managing Git Repos
Git can be completely managed via the command line. I, however, choose to use an app called Tower that has a nice interface to manage my repos.
In Tower, choose the option to Add Local Repository. This will bring up a finder window where you will need to select the folder where your local website is saved. For example, mine is in /Applications/MAMP/htdocs/mysite/. Once you select it, click Add Repository to continue.
Once added, double click the repo name to open it and you should see something like this:
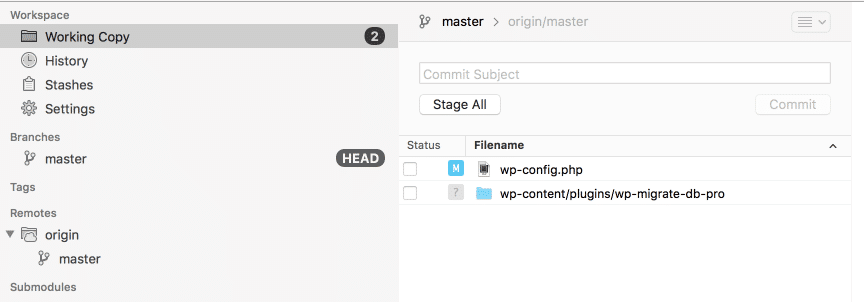
There are a couple things I’ll point out:
On the left, in the section called Remotes, you’ll see the folder called origin. This is the Site Ground repo. I typically rename that to SiteGround by right-clicking on it, just to avoid confusion later.
On the right, you’ll see a couple of local changes. The first are the updates to the config file you made. The second is the Migrate DB Pro plugin you added. Go ahead and commit both of those changes and push it up to SiteGround so both are in sync.
We’ll come back here in a minute to add BitBucket to Tower. But first…
Create a BitBucket Repo
Technically speaking, you could use BitBucket or GitHub or any other 3rd party Git repo service you like. I’m a fan of BitBucket because of their pricing model. It suits my needs the best.
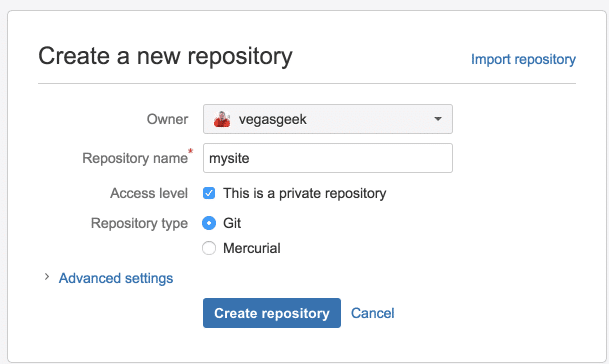
In BitBucket, click the Create Repository button. Give it a name and be sure to make it a private repo.
On the resulting page, click the I’m starting from scratch link which will display a box that looks like this:
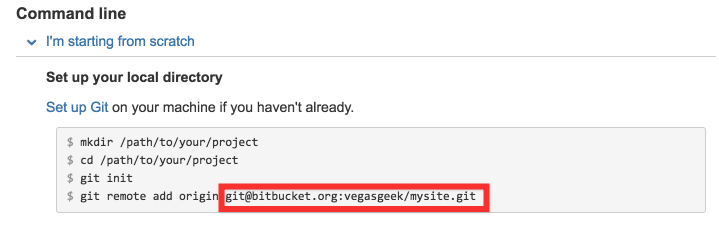
You will want to highlight and copy to the clipboard only the section that I’ve highlighted above. Once you do that, we’ll jump back into Tower.
Add a Remote
In Tower, right-click on Remotes in the left column to bring up the Add a Remote dialog box. Add a name (BitBucket) and then paste the info from above into the Repository URL field. This will drop down a few additional fields. When done, your screen should look like this:
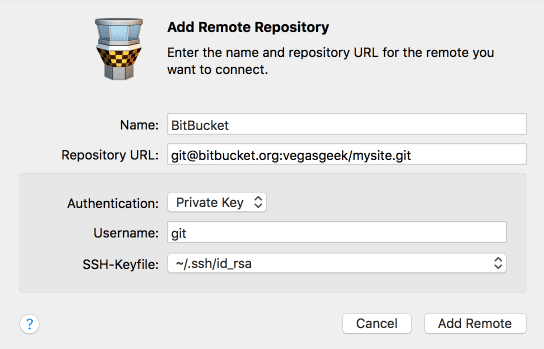
Once you click Add Remote, you will now have two remotes listed in Tower; SiteGround and BitBucket.
Moving forward, when you make changes to your code, push your code to BitBucket frequently. Then, when you’re ready for your new code to go live, push the code to SiteGround.
Done!
Well, that’s it. I know it sounds like a lot of steps, but in practice, it’s not so bad, really. And the end result of being able to push code using Git as compared to having to FTP files to the server makes this TOTALLY worth the effort!