Setting up a Google Tag Manager account
Setting up a Google Tag Manager account
In order to use Google Tag Manager (GTM), you are going to need a GTM account. Once you have the account set up, you can invite to me an admin which will allow me to manage your GTM account without needing access to your email account for setup.
In this guide I will walk you through the steps of creating your account and inviting me to be an admin on your GTM account.
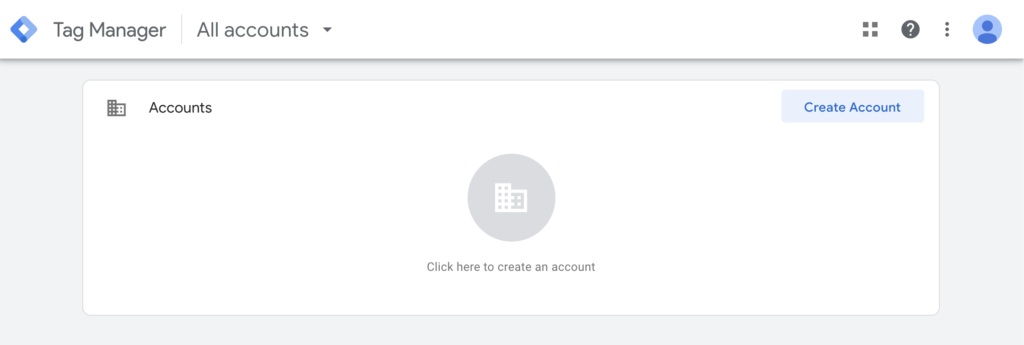
1) You'll need to create your GTM account. Do this by going to https://tagmanager.google.com/ and log in with your Gmail or G Suite account. Once you do, you'll see the following screen where you will click the “Create Account” link in the top-right corner.
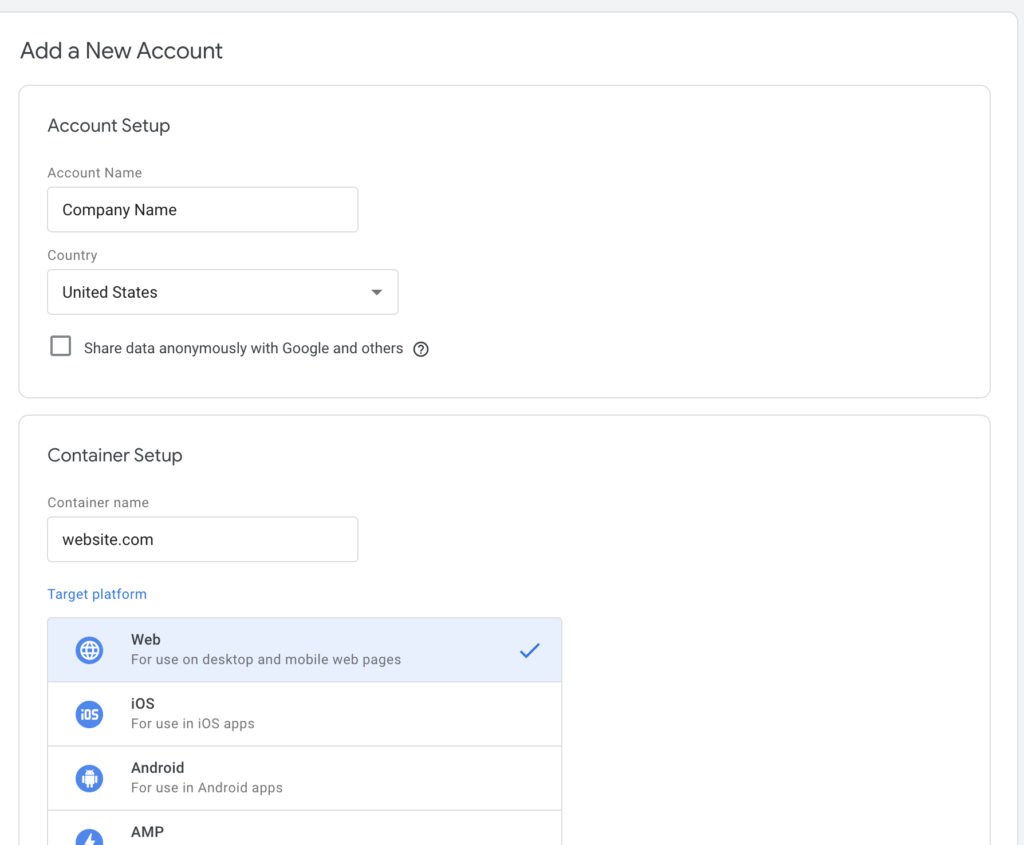
2) You'll see the Add a New Account page. Fill in the blanks similar to how I have done in the screenshot below. Two notes for you:
- For the Account Name, think of that as the overarching account name. Not a website specific name. This is especially important if you are going to have multiple websites all using GTM.
- The website specific info is in the Container Setup section. This is where you will put the website's name. I like to use just the domain name as shown in my example.
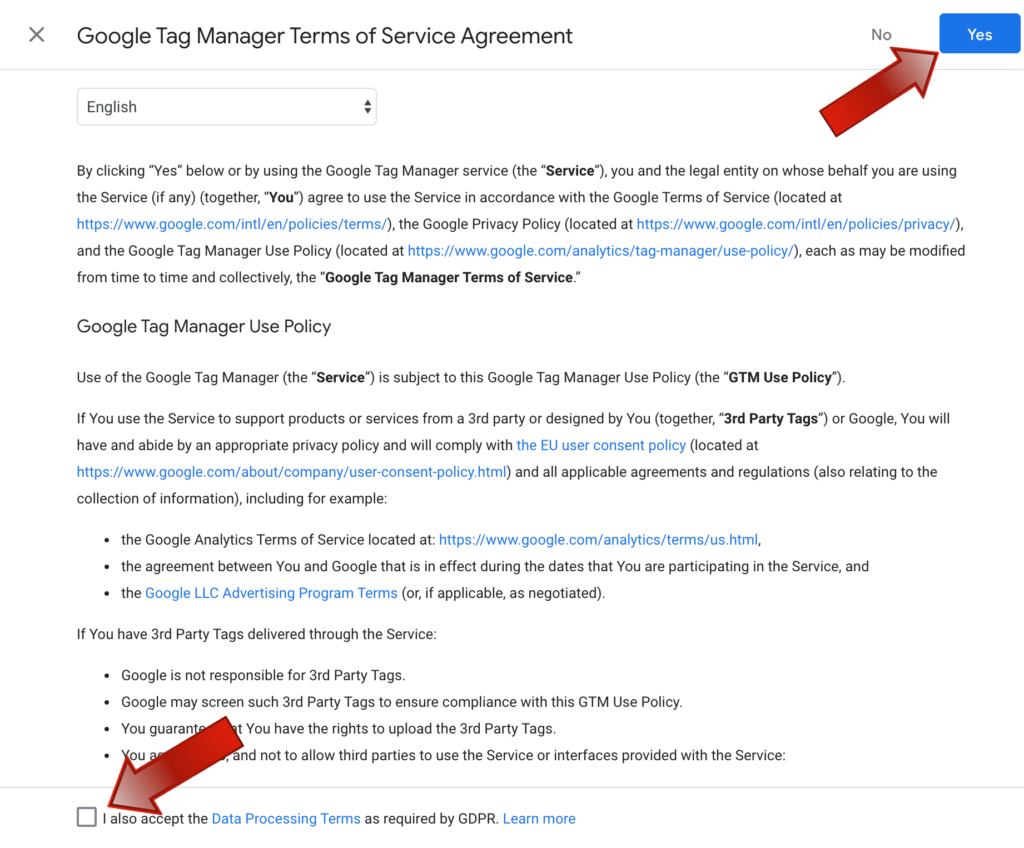
3) You'll be shown the services agreement. Click the checkbox at the bottom and then the Yes button up top.
4) The next screen you will see is the code that needs to be added to the website. There is no need to send this to me. I will be able to grab it once you make me an admin on your account.
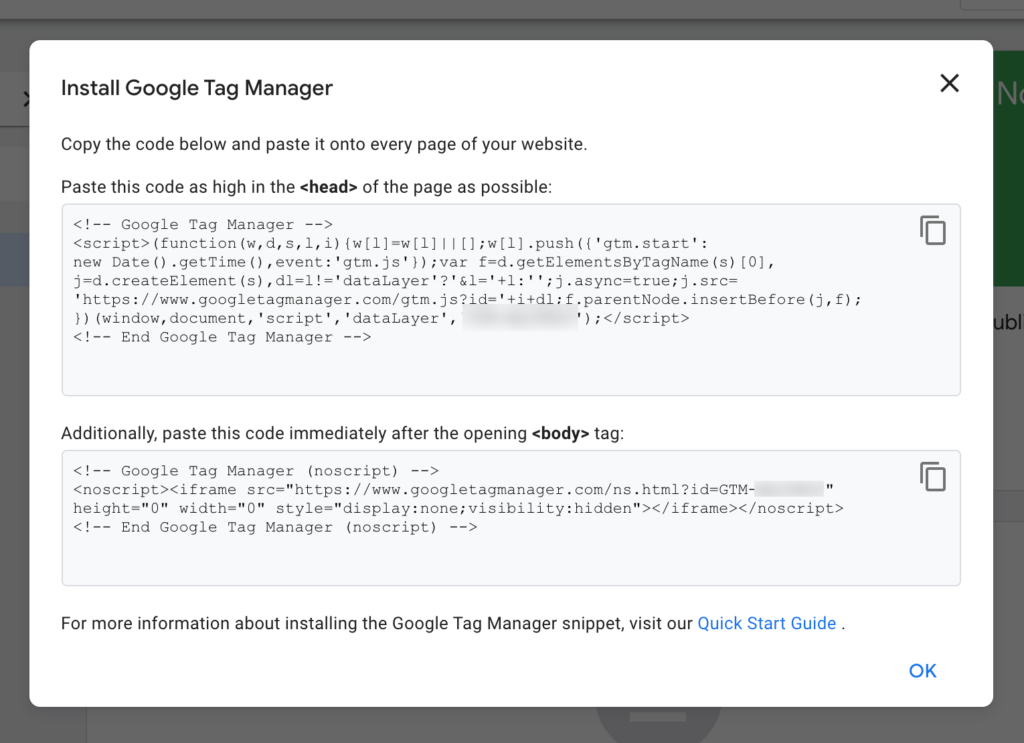
5) Once you close the screen above, you'll be taken to the Tag Manager dashboard, shown below. Click the Admin link near the top.
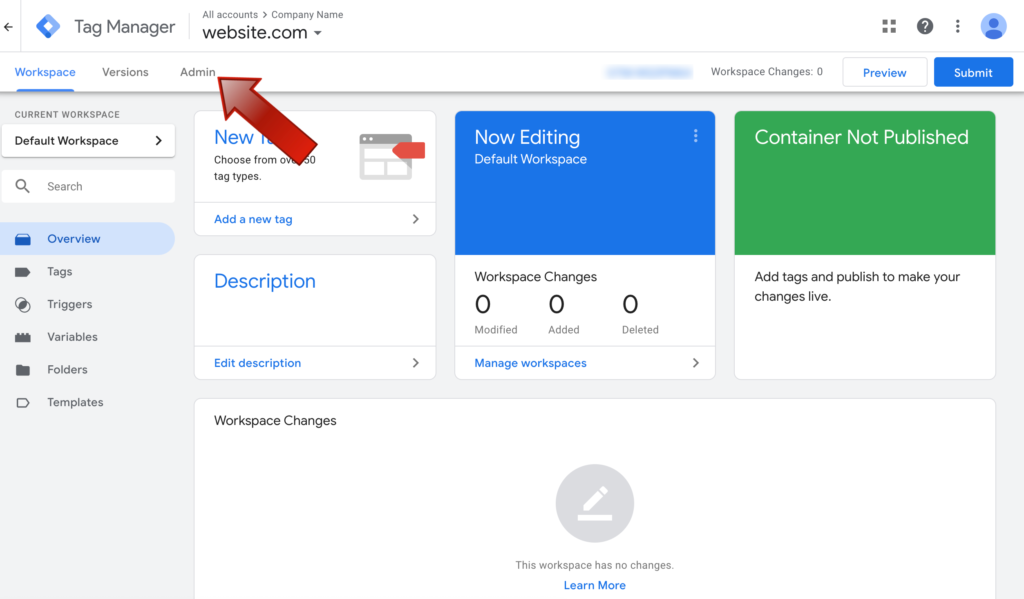
6) On the Admin screen, click the User Management link.
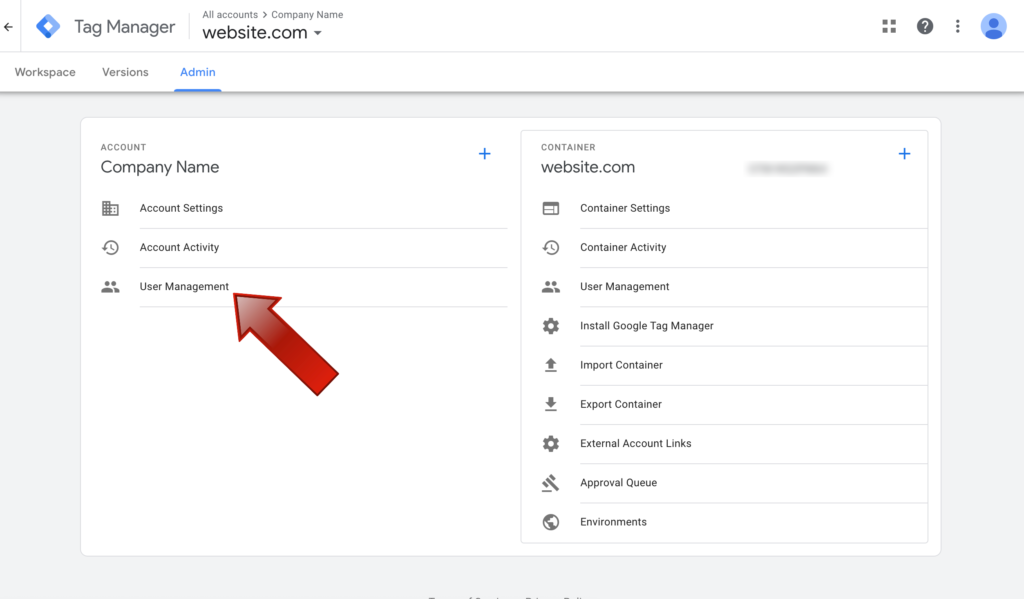
7) This will take you to the Account permissions page where you should see a list of all your users. Since you just created the site, the only user should be yourself. Click the blue Plus icon in the top-right corner and then click the Add users link in the pop-up as shown below.
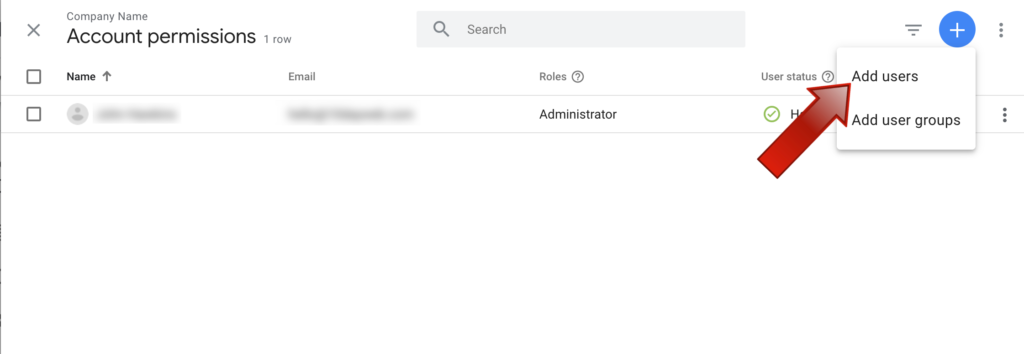
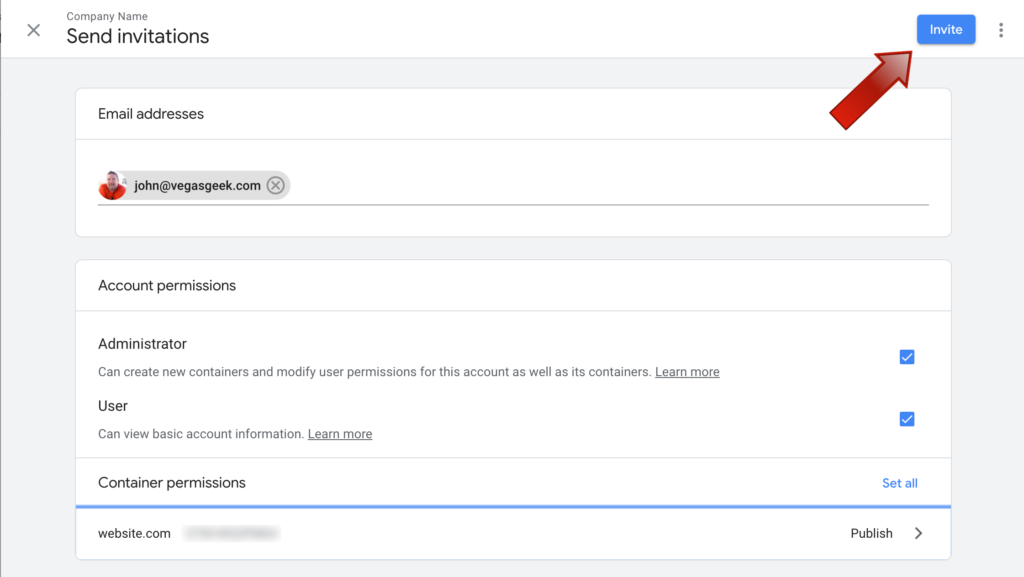
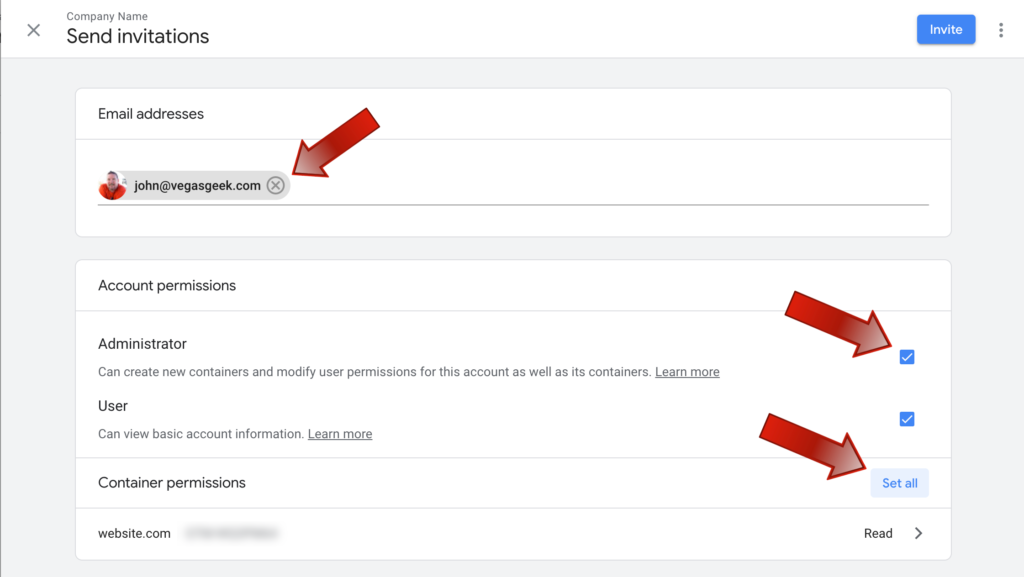
8) On the Send invitations screen, this is where you will send an invite to me to become an admin.
- At the top you will type in my email address ([email protected])
- Click the checkbox next to Administrator
- Click the Set all link to update permissions
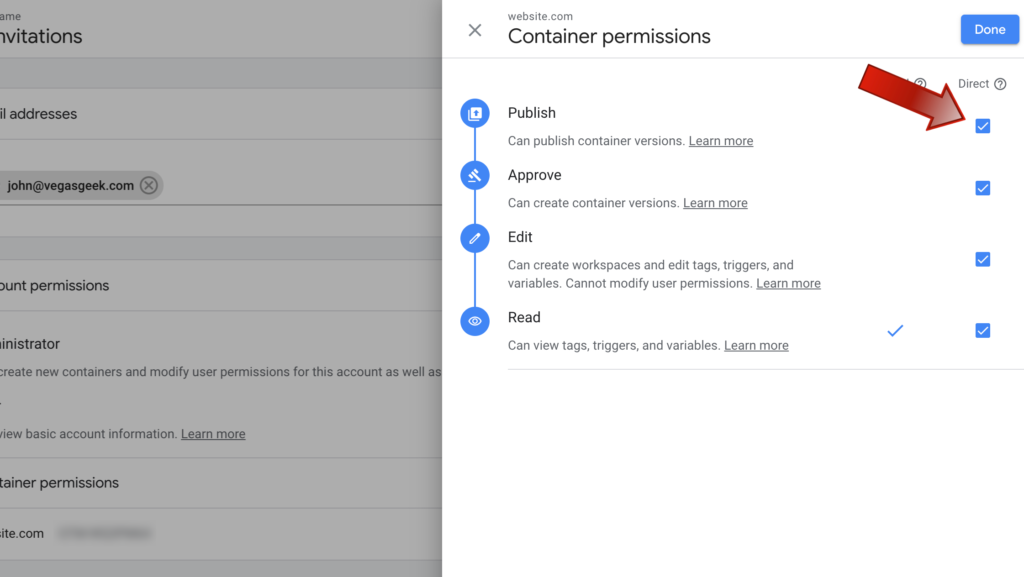
9) On the Container permissions popup, click the checkbox next to Publish as shown below. Click Done in the top-right corner to go back to the previous screen.
10) Finally, click the blue Invite link in the top-right corner to send me the invite. I should receive it in a matter of minutes. Feel free to send an email once you're done and I will let you know once I confirm that I have access.
